
It's not all in a name, not here at least
"Chicken Ball" sounds very unappetising, a name more capable of winning a playground name calling contest than impressing dinner guests*. I am undecided regarding which scenario fits the name better:
Scenario 1:
"What's for dinner tonight?"
"Chicken Balls"
Scenario 2:
"Oi, Chicken Ball, gimme your lunch money!"


Recipe notes
I created this recipe as a very basic and mildly flavoured staple to which other flavours can be added to suit a dish. That's right, you can buff it up with all your favourite flavours. It's not intended to be hugely flavourful because flavours will be added to suit the dish. Here are a few suggestions:
- Using it in a curry? Try adding some cumin or garam masala and a little extra salt.
- Want a chicken-meatball pasta dish? Try adding some more rosemary and perhaps other herbs to the mix. Maybe some celery salt, too?
- How about a spicy chili or stew? Add some cayenne pepper or go all out with some smoky chipotle!
- Change the texture by adding more vital wheat gluten. I have made the recipe both like below and with more gluten. Both are good, but added gluten yields a more solid result with a chewier texture.
Update 15 September 2008: I used these in this Rajasthani Kadhi Recipe along with a few handfuls of spinach. Highly recommended! Yum-tastic!
*luckily those include only my cats and hubby.
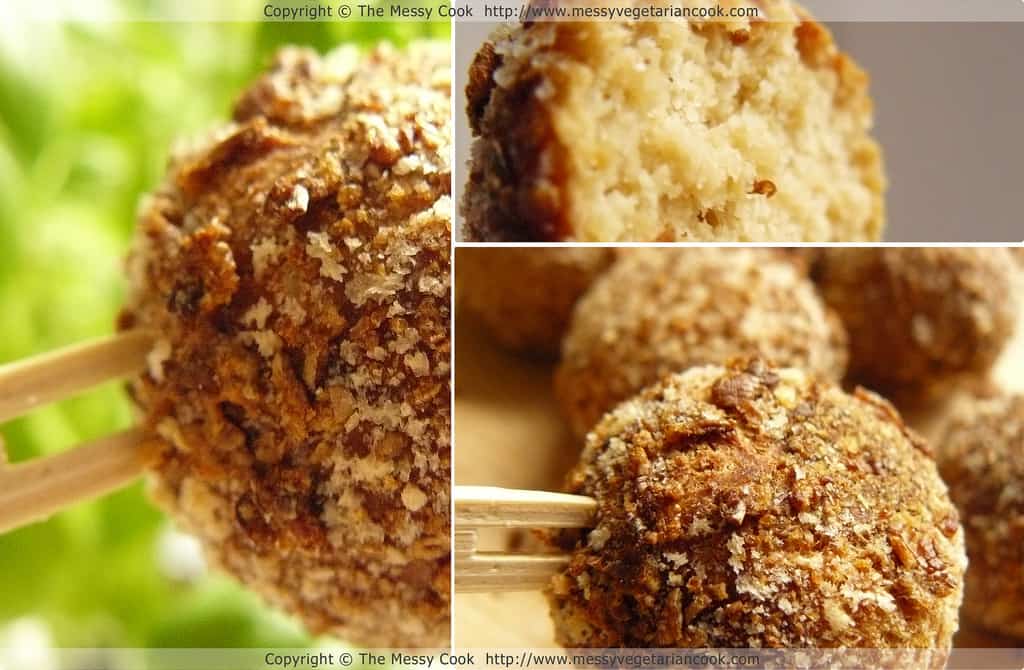
Vegetarian Okara "Chicken" Balls
- Directions/Method
- Pre-heat the oven to 175 celcius (350 F) and lightly grease a baking sheet.
- Preferably use a food processor to blend all of the ingredients except for the gluten flour into an even paste, but you can do this by hand if there are no other options. Grate the onion and mash the chicken substitute as much as possible and then add the other ingredients. The mix will be fairly wet depending on how much moisture is in the okara. I use fresh okara, not dried, so if you use dried then you will likely need to add more liquid.
- Add the wheat gluten flour to the wet mix, mixing evenly and thoroughly, but no need to over-mix. You may need to play around a little bit here. The result you're after should be a wet dough just hard enough to roll into balls. Add more liquid and/or gluten flour in small quantities in order to find this balance.
- Roll the dough into approximately 1-inch balls (I have done larger, so I know it works too). Roll each ball in the breadcrumbs and place on the baking tray. Once all are coated, pop in the oven for about 30 minutes. Turn over halfway through baking.
- The final product should be browned and crispy on the outside, but not burnt (I feel I have to clarify this because I often burn some foods on purpose)!