Have you ever wondered how to make Thai coconut curry that will turn out like the one you had on holiday on that soi in Bangkok? Are you trying to figure out how to get that rich oily float on your red curry? Hopefully this guide on how to make Thai curries that are coconut based will steer you and answer any questions. Included is an explanation of the difference between coconut milk and cream, how these are distinguished in Thai language (with some loss in translation with English recipes in my opinion), and the role they play in both frying and boiling curries.
Jump to:
This is a guide on how a Thai coconut curries would typically, though not exclusively, be made.
Make the paste (or buy it)
Curry pastes today typically utilise the same foundational herbs and spices, including chillies (dried or fresh), lemongrass (the lower, more concentrated end of the stalk with purple rings), galangal, garlic, shallot, and shrimp paste (which is easily veganised). I put together a rather large guide to Thai curry pastes if you are interested in more information about the vast repertoire.

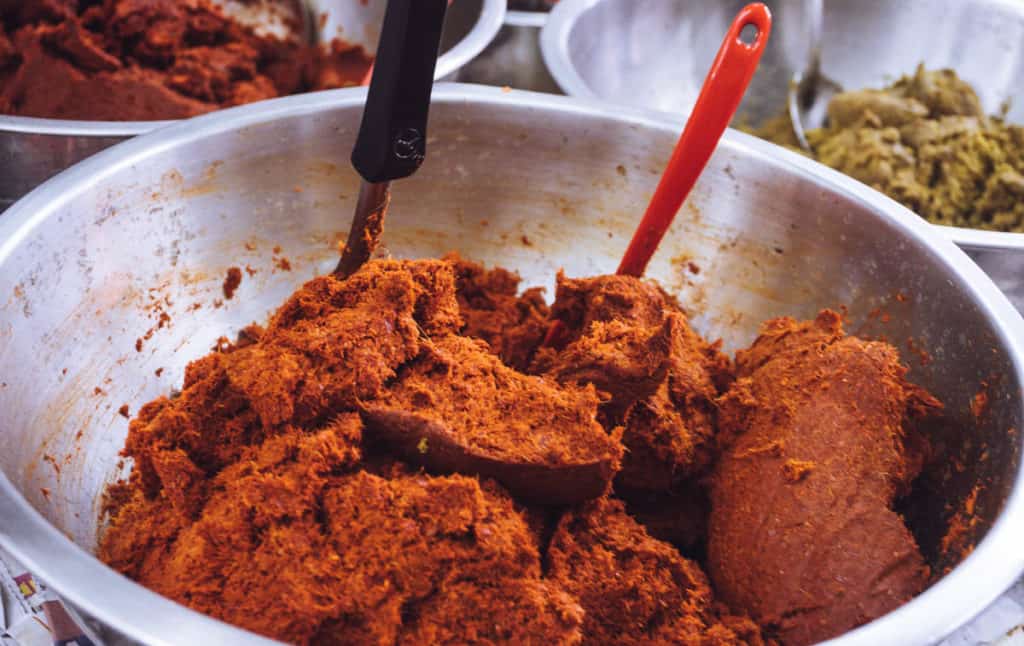
Ingredients are typically added to a mortar in order of toughness and dryness, with an initial focus on fibrous aromatics like lemongrass and galangal, and pounded with a pestle. Softer ingredients like garlic and shallot go in toward the end and take far less time to incorporate. The paste should be uniformly blended into as fine a purée as possible. Smell the paste when you are finished. The aroma should be well rounded, with no single component ingredient screaming out at you.
The would be curry paste police will insist curry pastes made using a pestle and mortar are superior to those made in a blender or food processor. I see the problem with electronic tools as one of inferiority for another reason: you need a high volume of ingredients to cover the blades before you can achieve a good, smooth paste. If I’m cooking for a lot of people and can afford to double or triple my curry paste recipe, I always use my Vitamix. In my opinion food processors cannot make a fine enough paste.
Many recipes will suggest adding water or oil to a blender to aid in making the ingredients moveable by the blade. In my opinion adding water is permissible only if you are making a boiled curry in which the paste does not need to be fried first. My reasoning is twofold; water dilutes the curry paste and I am not a fan of cleaning oil splatters resulting from adding water to hot fat. If you are making a coconut based curry, it’s not traditional but okay to add a little bit of coconut milk or cream to loosen the blades, but with one caveat: you will need to increase the amount of paste you use in your curry. This will also significantly decrease the shelf life of your paste.
Expect to spend 20-30 minutes of labour to make a Thai curry paste made by method of pestle and mortar.
Fresh curry pastes store for at least a couple of weeks in the fridge, but do not freeze well.
To make Thai curry paste from scratch is a labour intensive process, so if you don’t have the time and/or inclination to spend half an hour pok-pokking away with your pestle and mortar then just buy a jar. If you do use a pre purchased paste, use quite a bit less (as much as half the amount) when you make your curry.
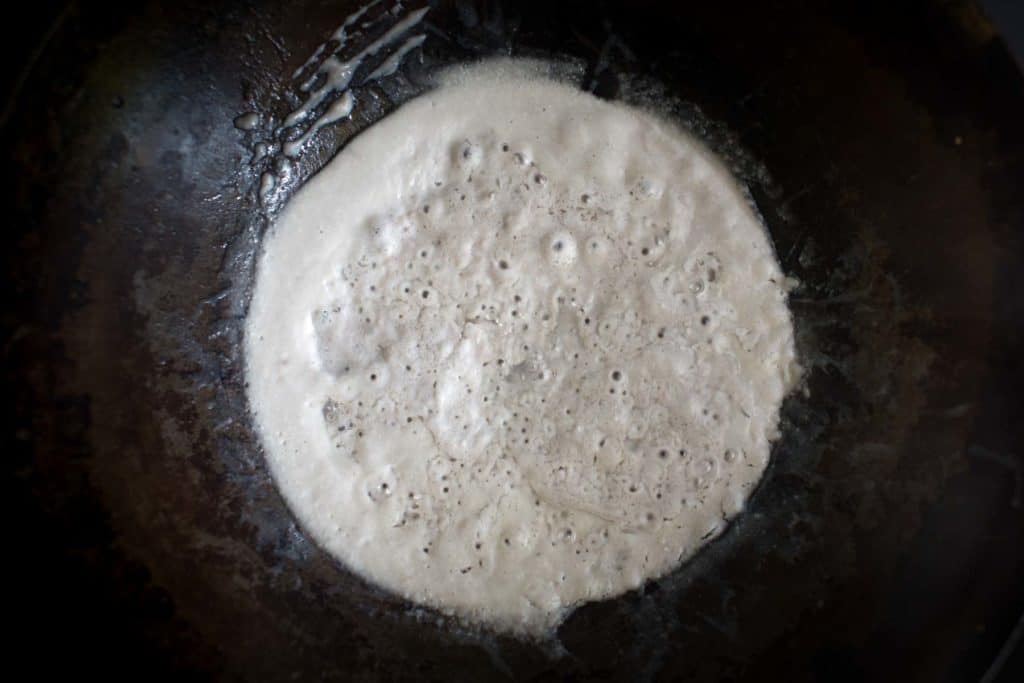
Reduce & crack the coconut cream
The traditional Thai method of frying curry paste involves reducing coconut cream until the oil separates from the liquid. This method of "cracking" the cream renders the oil your paste is to be fried in. Some brands crack more easily than others. Aroy-D in a carton is always a solid option (despite their recent addition of emulsifiers it still cracks) as are any brands with only water and coconut (citric acid is okay) as ingredients.

The difference between coconut cream and coconut milk
In Thailand there is a different understanding of how to use coconut cream versus coconut milk in curry preparation, which I will explain. Think about what happens if you leave non emulsified coconut milk to settle. A thick layer forms at the top, while a thinner (perhaps even nearly clear) liquid settles at the bottom. In Thai this top layer is referred to as hua gati (coconut milk head), while the bottom layer is hang gati (coconut milk tail).
Fry the curry paste
Let's bring the previous points together. In traditional coconut based curry preparations the fatty top layer of cream (hua gati) is broken over heat, a process that separates the oil from the solids. Curry paste is fried in this cracked cream. This step is what leads to an oily sheen blanketing your stew at the end of cooking (this layer is an indication of curry-cooking prowess).
You might notice some of my curry recipes include using additional coconut oil in the frying process. I do this for one of two reasons: if I don't have enough coconut milk or I am using an emulsified brand that will not crack.
It's important to either crack the cream properly or use some oil because if there is no oil present in your pan when you add the paste you are only boiling it. No matter how many times someone suggests you can fry in anything other than fat, you physically can't. Just like you can't toast bread with boiling water. If you have ever wondered why your curry tastes of raw garlic, it's because the chef didn't fry the curry paste properly.
Can you skip this step and just fry the paste in oil? Yes, of course. Purists may roll their eyes, but I don’t think it’s a major sacrifice. As for the type of oil, a virgin coconut oil is preferable but a bog standard vegetable oil will do just fine.
Top up with liquid
So you've used the top of the coconut milk (cream), reduced to oil, to fry the curry paste and you’re ready for the next step in the recipe. The aforementioned coconut milk tail, which may be so thin it’s only slightly opaque, is typically what makes up the bulk of the liquid in the rest of the curry.
Western palates, in my experience, tend to champion richer, creamier textures in Thai curries. These thicker and kluk klik style curries exist in Thailand too (e.g. Panang and choo chee curries, among others), but your everyday gaeng is likely to be far thinner than what is evoked by European or American imaginations.
Were you to buy both coconut cream and coconut milk as they come packaged on our supermarket shelves, and only use those products with no dilution, you would end up with a more rich and thick curry. This is fine if that's what you want and it is absolutely a part of Thai curry culture too. Effectively you are making a curry with mostly only the head of coconut milk, or the cream, since a significant percentage of a can of coconut milk is cream anyway. For this reason I rarely buy products specifically labelled as coconut cream. Instead I look for coconut milk with at least 60% coconut extract (e.g. Aroy-D brand). This way you have a fatty product you can use to both fry your paste in and water down if necessary to top up your curry.
When I am making a more souplike curry, my preference is to top up with a 1:1 ratio of coconut cream and water (or stock). For reference I typically use one 400 millilitre can of coconut milk to make enough curry for 2-4 people. I cook down the top 60-80 millilitres (¼-⅓ cup) of coconut cream to crack and fry the paste, and then top this up with the rest of the can and some water or stock.
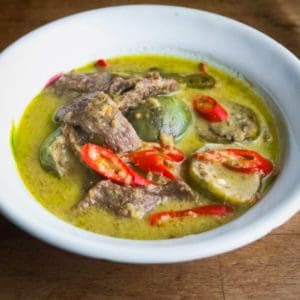
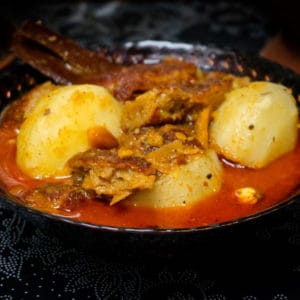
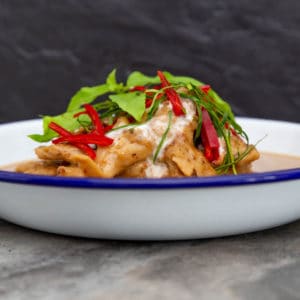
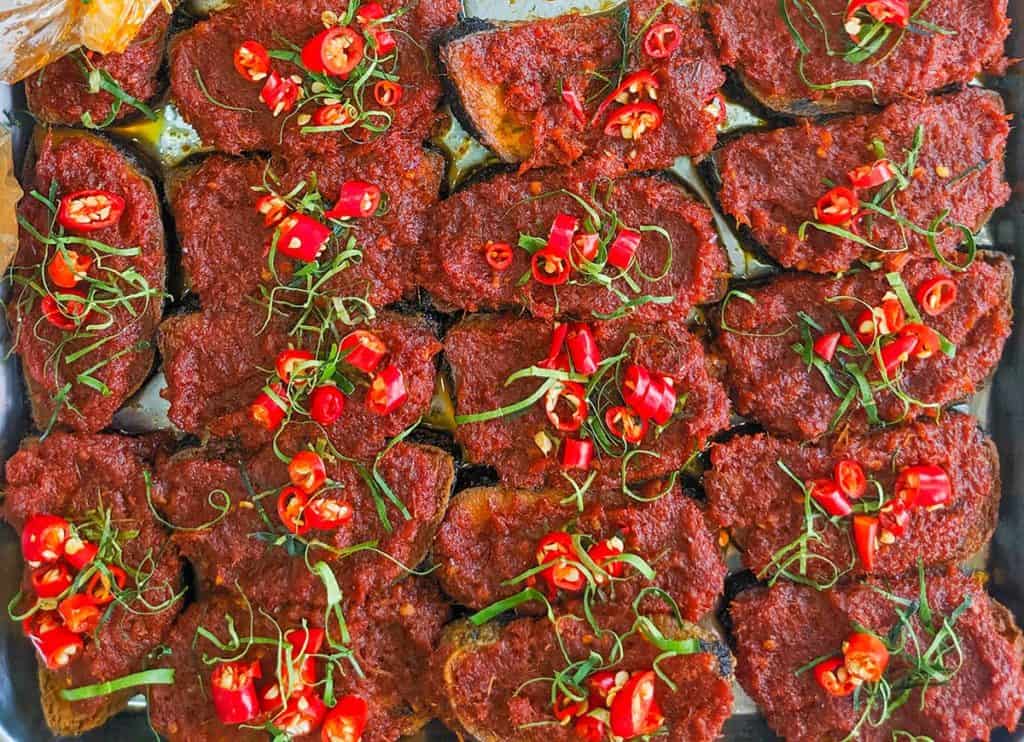
Take a look at a few examples of curries I have made or seen. Hopefully these will help to illustrate some of my points.


Add your vegetables and proteins
Anyway, so at this point you have fried your paste and added additional liquid, whether coconut milk, cream, or a blend with water. You should have a soup, thick or thin, with an oily sheen. The more coconut cream you crack, the thicker this dappled and unsinkable fatty layer will be.
It’s time to add your vegetables and/or proteins, but keep in mind that some will act as emulsifiers and suck that lovely surface oil back in. Potatoes, for instance, because they shed emulsifying starches, are best boiled in a separate pan of water before adding them to the curry toward the end of cooking.
Taste, season, and serve your curry
A step skipped by many, but is as important as any other, is to taste for seasoning. Thai curry is meant to be consumed with rice. Consequently the curry ought to taste perhaps a little too strong (e.g. salty) on its own. This is the point where you might need to add additional salt, soy sauce, or a good vegan fish sauce if you have it. If there is a souring agent like tamarind, now is the time to add it. Should your curry feature some sweetness, you can also adjust that to taste at this point. For the record, I will nearly always add more seasoning in this step.
Once you’re happy with the flavour, add soft herbs like basils (coriander is not traditional) and dish up with freshly steamed jasmine rice.
A summary of how to make Thai coconut curry
Making Thai coconut curries is, in my book, a basic six step process as follows:
- Make or buy your curry paste.
- Crack coconut cream to separate oil for frying the paste.
- Fry the paste either in cracked coconut cream or oil.
- Top up with coconut milk.
- Add vegetables and proteins to cook.
- Taste and season the curry.
Happy curry making! Here are a few you might like to try.