Hailing from Japan’s Northern Akita Prefecture, the main ingredients of butter mochi are pounded glutinous rice and butter. But, like with most mochi made from scratch at home nowadays, we use sticky rice flour as a shortcut to avoid the labour of pounding steamed glutinous rice to a paste. And, of course, we are able to make vegan butter mochi with a good quality nondairy butter.

This is not a recipe for Hawaiian butter mochi. The Japanese style butter mochi differs from its homonymous pacific islands cousin. Hawaiian butter mochi is more like a blend of Japanese mochi and baked Western cakes, while the Akita style is a bit more akin to the texture you would find from mochi purchased in Asian markets globally.
But the butter mochi recipe at the bottom of this post is also not precisely the Japanese style either. In addition to butter I have added additional flavours of makrut lime leaf, rose water, and saffron. Consequently the flavour is more reminiscent of Western Asian sweets with the Q texture you would expect of East Asian sticky rice confections.
📖 Recipe
Scented vegan butter mochi
Equipment
- 4-5 inch square tray
Ingredients
- 180 grams oatly barista
- 3 makrut lime leaves
- 1 ½ teaspoons rose water
- Pinch saffron
- 85 grams glutinous rice flour see notes1
- 75 grams sugar
- 35 grams Naturli butter
- Couple good pinches salt
- potato starch
- roasted soybean flour
Instructions
- Add the milk, lime leaves, rose water, and saffron to a saucepan and bring to the boil. Turn down to low heat, cover, and simmer for 2 minutes. Turn heat off and leave to cool to room temperature.
- Add glutinous rice flour and sugar to a bowl and whisk to combine. Once the infused milk is cool, remove and discard the limes leaves. Pour the liquid into the flour and whisk the mixture until there are no lumps.
- Bring your steaming apparatus to a rolling boil. Add the batter to a heatproof bowl. The bowl should be large enough to allow you to easily stir the mochi without spilling over the edges. Place the bowl in the steamer. Cover the lid (on the bottom) with tea towel in order to prevent the condensed water from the steam dripping into the mochi. Steam for 10 minutes.
- Carefully remove the bowl from the steamer (this is so you avoid steam burns). Add the butter and give the mixture a good whisk and/or stir to combine.
- When the butter is melted and fully incorporated, place the bowl back into the steamer and cook for another 10 minutes.
- Remove from the steamer and give the mochi a few good stirs with a spatula, kneading it for a minute or two.
- Transfer the mochi to your square mould. You can use a silicone spatula dipped in water to help smooth the top surface if you want. Leave to cool for 30-60 minutes and then pop the tray in the fridge for at least 2 hours.
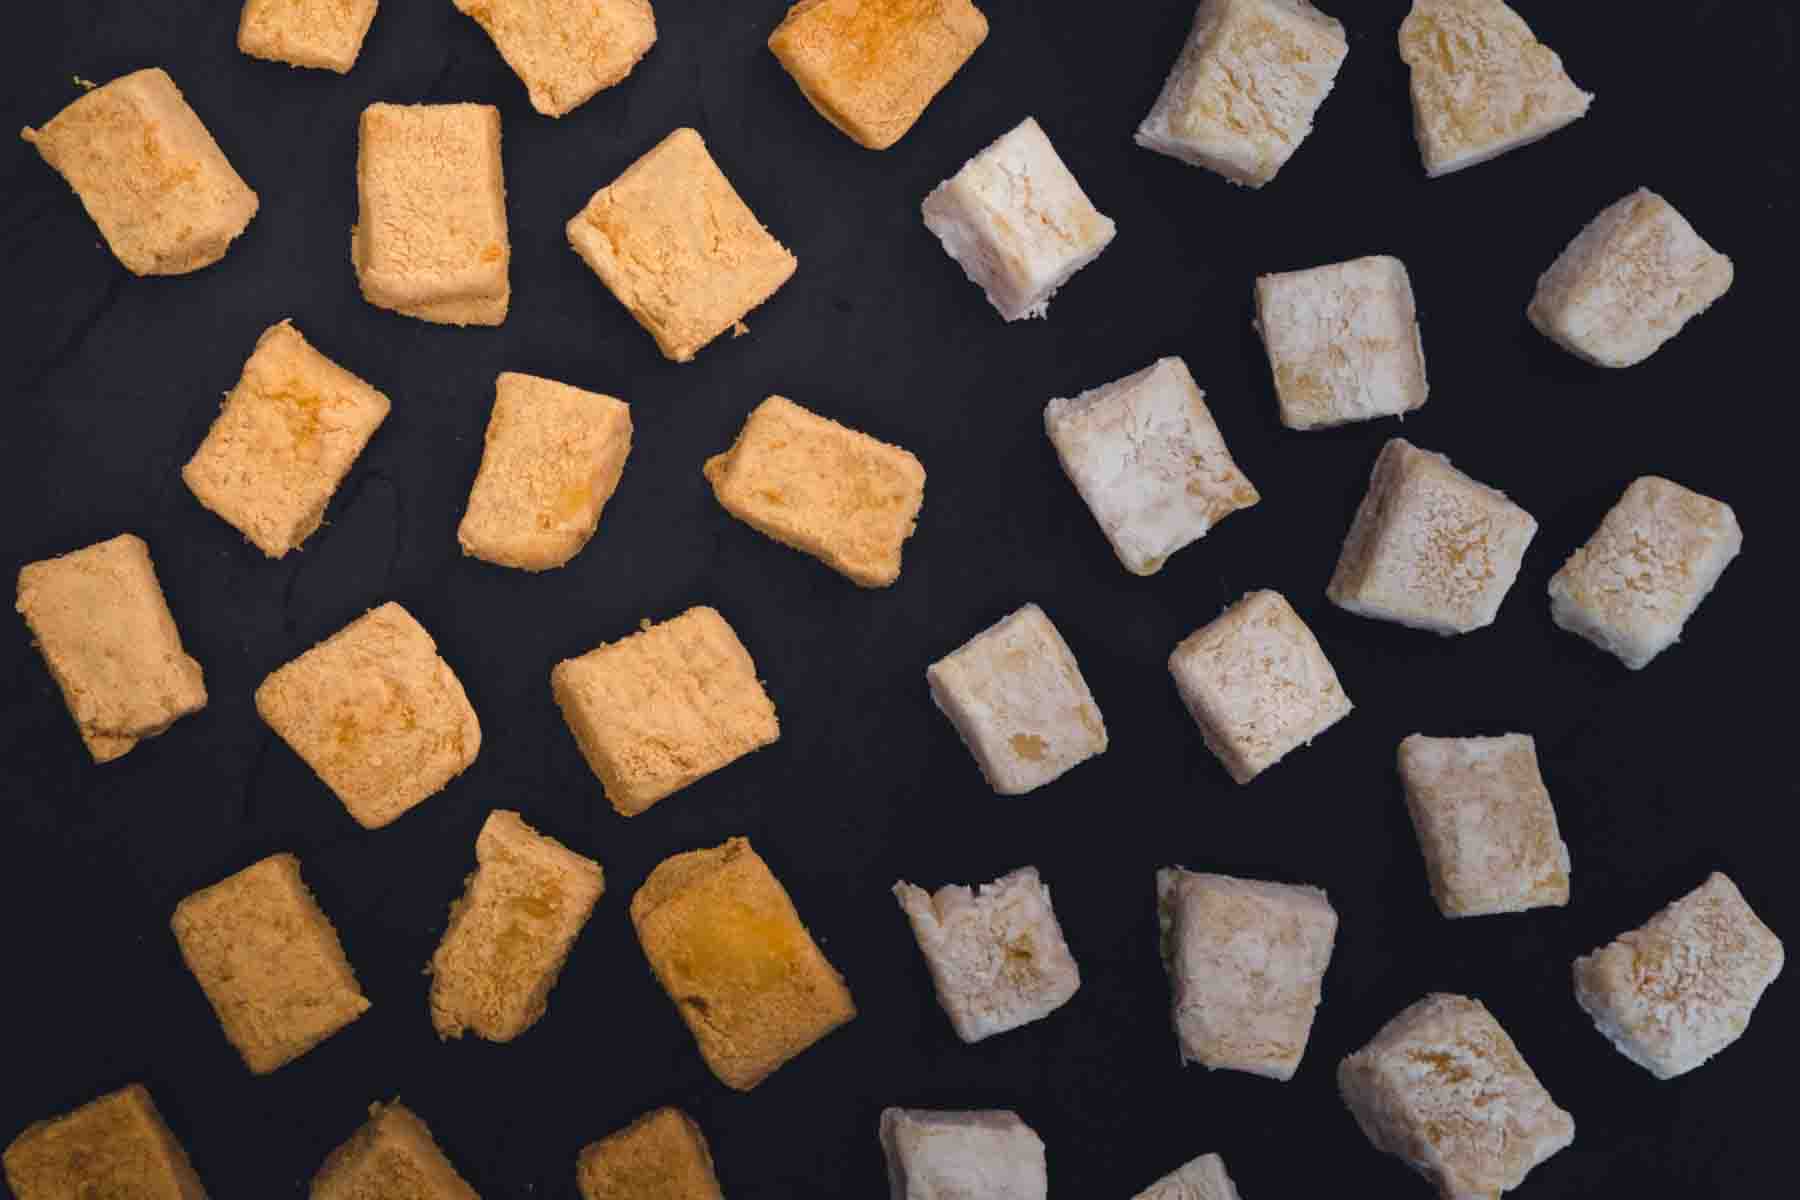
- Once cold and firm, remove the mochi from the fridge. Unmould the mochi on a cutting board that has been liberally dusted with either potato starch or roasted soybean flour. Cut the mochi into squares and roll them in more starch or flour. See notes2
- You can serve the mochi immediately or keep it in the fridge to eat later.
Notes
- Tradition dictates mochiko or shiratamako flour must be used, but I have found success with Thai glutinous rice flour as well. And since this is the flour I always have to hand, it tends to be my sticky rice flour of choice.
- If you find the mochi too sticky to slice, wet your knife first. But, if you decide to use a wet knife then cut the mochi before adding it to the starch or kinoko.

Leave a Reply