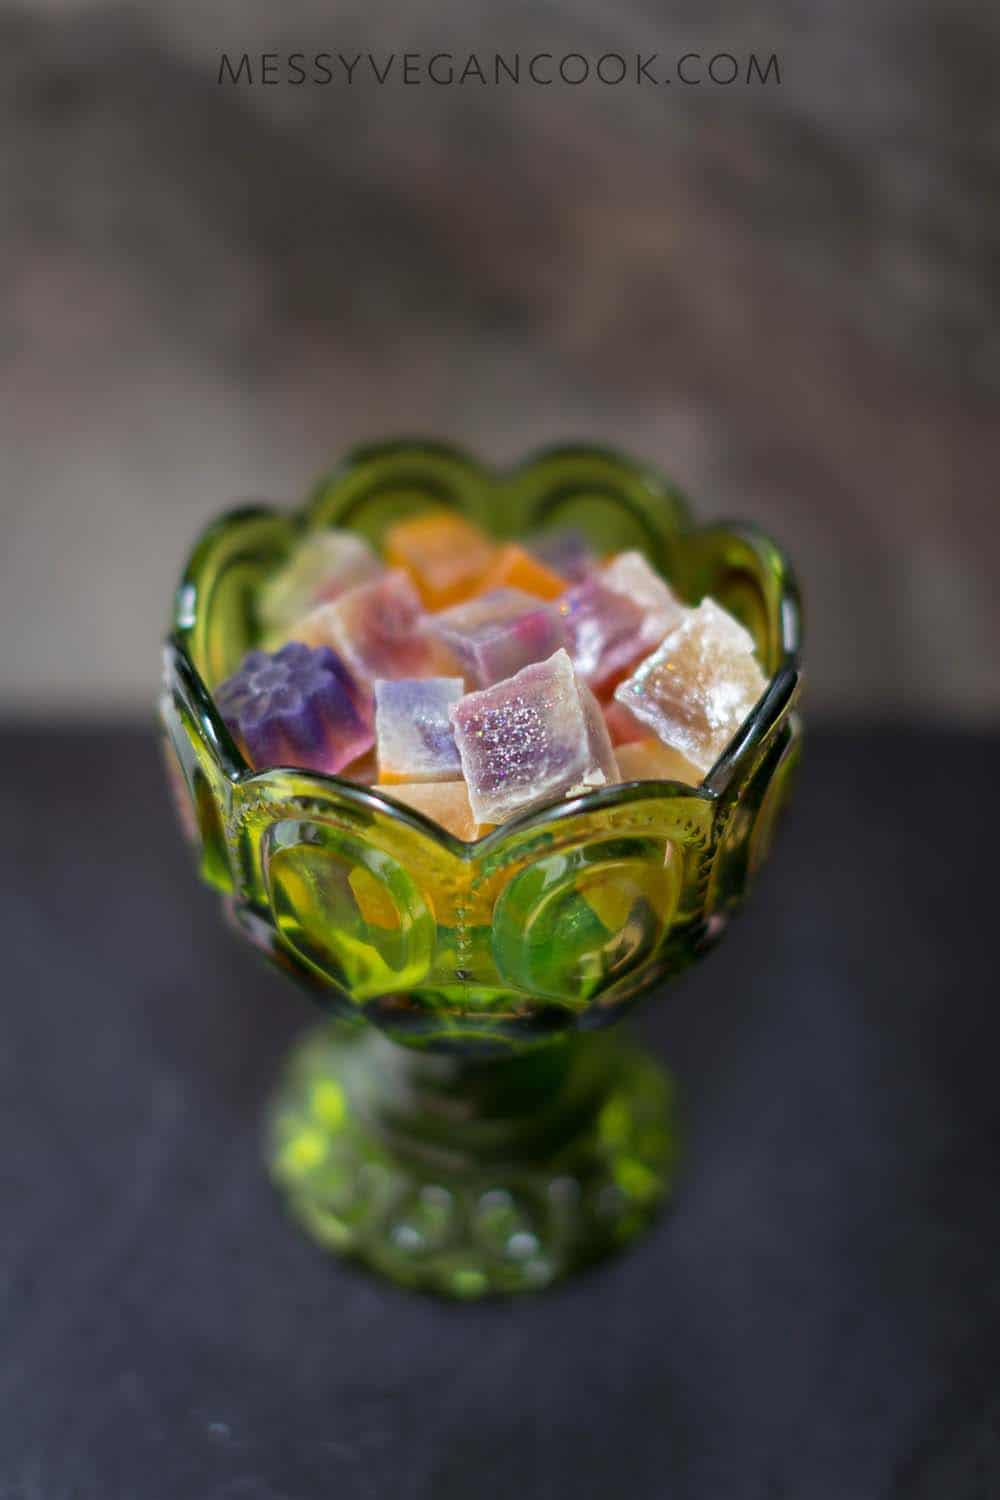
These easy to make dried agar candies are found in many Asian countries. The Japanese wagashi form is called kohakutou, while in Indonesia it is agar agar kering. My recipe is for a Thai version called kanom woon grop.
WOON GROP – วุ้นกรอบ
As easy as they are to make, kanom woon grop can take several days before they are ready to consume. This is especially true if you live in a non-tropical, sun-sparse climate. The reason for this is because once the sweets are prepared, they are left to dry in the sun for several days until a hard, crystalline sugar coating has formed.
Since I live in Britain, where hot sun is rarely found more than a few days a year, and rarely consecutively, I use a dehydrator. Agar melts at 65 degrees celsius, so should you opt for this method be sure to stay below this temperature. It typically takes 2-4 days for a crisp shell to form when using a dehydrator to dry agar sweets.
My recipe for these Thai candies contains just four ingredients at a minimum: agar powder, water, sugar, and arrowroot starch. You can add colouring and flavour extracts should you wish.
Kanom Woon Grop – Crispy Agar Sweets
วุ้นกรอบ
- 12 grams (4 ½) teaspoons agar powder
- 500 millilitres (2 cups) jasmine water, made by soaking fresh or dried jasmine flowers in water overnight (or plain water with a few drops flavour essence of choice)
- 515 grams (2½ cups) white sugar
- 25 grams (3 tablespoons) arrowroot starch + 30 millilitres (2 tablespoons) water
- Food colouring (optional)
- Food grade glitter (optional)
- Whisk agar powder and water together in a saucepan and heat on medium-high until agar powder is dissolved, a few minutes.
- Add the sugar. Whisk and leave to simmer for 2 more minutes, until the sugar is dissolved. To see if the sugar is dissolved dip a spoon into the liquid and observe the back to see if there are any undissolved grains.
- Mix arrowroot starch and 2 tablespoons of water in a small bowl. Tip into the agar solution, whisking to ensure it is mixed properly. After a couple of minutes the liquid will thicken slightly from the tapioca starch.
- If using food colouring, add and mix through.
- Pour the liquid into silicone moulds or a tray (see tips at the end of the recipe for more ideas). I use three small 4.5 x 4.5 inch trays. Leave for at least a couple of hours to cool and solidify.
- Tip the agar out. Cut square block into ½ inch cubes. Dehydrate on a low heat for 1-5 days, until there is a crystalised sugar coating on the outside of the candies and all sides have a thin sugary shell. If you live somewhere sunny you can leave them in the sun (covered with a net) to dry as well.
- Author: Kip Dorrell
- Makes: About 110 pieces
- Cuisine: Thai
Fiona Manoon
Looks Delicious. !!!!
I loved your presentation .
Great Work . Thanks for sharing .
Your post is amazing . Your have shared this amazing recipe quite nicely that it sounds so easy to make.
Thanks !!
Melisa Martinez
Hello why is the arrowroot starch for? Cause you are already using the agar agar, I have problems with the cristalizaron due ti the weather, a lot of humedity and hot, is the starch helping in the process? Thanks for helping✨
Kip
Arrowroot starch imparts a gummy quality. It's also more clear, so it's good if you don't want opaqueness in desserts. It's not a requirement to make kanom grop but I prefer the texture. As an ingredient it was more popular in history than in the present (due to supply and cost, mostly – it's just that fewer people are growing it). As far as how arrowroot starch reacts to hot and humid weather, I'm afraid I don't know if it plays a role in slowing crystalisation. My suggestion would be to ensure good air circulation. If you don't have a dehydrator, keep a fan going, and make sure there's space between and regular rotation of the pieces. It could take several days; if it's rainy here it takes me a lot longer, perhaps by several days, to make a dessert like this.
I reserve the right to improve malicious and trollish comments.